Epson Printhead Error: Causes, Fixes & Complete Troubleshooting Guide
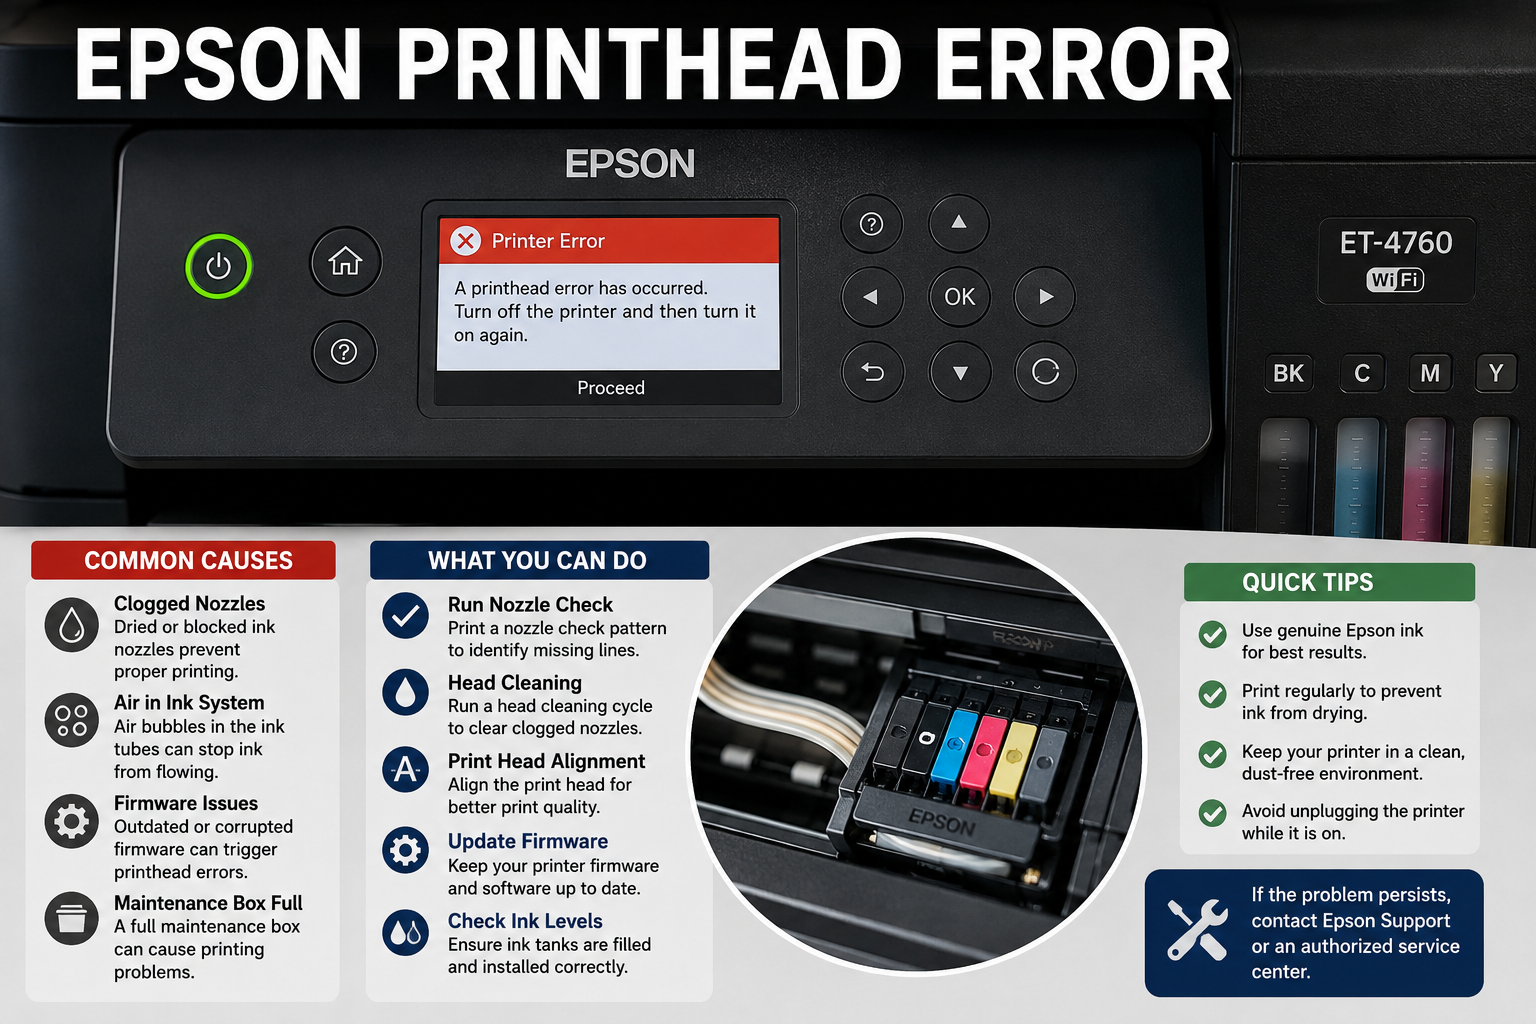
If your Epson printer suddenly stops printing correctly, displays a printhead error, produces blank pages, or shows missing colors, you’re not alone. Printhead issues are among the most common problems Epson users encounter, affecting everything from home EcoTank printers to office-grade WorkForce models. While these errors can seem alarming, many can be resolved without replacing the printer.
This comprehensive guide explains the causes behind Epson printhead errors, how to troubleshoot them step by step, and the best practices to keep your printer running smoothly. Whether you’re dealing with clogged nozzles, poor print quality, firmware issues, or hardware failures, you’ll find practical, technician-approved solutions here.
What You’ll Learn
In this guide, you’ll discover:
- What an Epson printhead error means
- Common symptoms and warning signs
- Main causes of printhead problems
- Step-by-step troubleshooting methods
- How to clean and maintain the printhead safely
- When to replace the printhead
- Preventive maintenance tips
- Answers to frequently asked questions
What Is an Epson Printhead Error?
An Epson printhead error occurs when the printer cannot properly use or communicate with its printhead. The issue may result from clogged nozzles, dried ink, electrical faults, firmware glitches, or hardware damage. Symptoms include blank pages, faded prints, missing colors, streaks, or an error message on the printer display.
Unlike many printer brands that use disposable printheads built into ink cartridges, Epson printers rely on a permanent Micro Piezo or PrecisionCore printhead. This design delivers exceptional print quality and lower long-term ink costs but requires regular maintenance to prevent ink buildup and clogging.
Common Symptoms of a Printhead Error
- Printer displays “Printhead Error” on the LCD
- Blank pages despite full ink tanks
- Missing black or color ink
- White horizontal streaks
- Uneven color output
- Smudged or blurry prints
- Nozzle check pattern shows gaps
- Frequent cleaning cycles with no improvement
Expert Insight: Many users assume the printhead has failed when the real culprit is dried ink, air bubbles in the ink lines, or outdated firmware. Performing a proper diagnosis before replacing components can save significant repair costs.
Common Causes of Epson Printhead Errors
Understanding the root cause helps you choose the correct solution instead of relying on repeated cleaning cycles that waste ink.
1. Clogged Nozzles
The most common cause is dried ink blocking the microscopic nozzles responsible for spraying ink onto paper.
Common reasons include:
- Infrequent printer use
- Dry or dusty environments
- Low-quality ink
- Long storage periods
Example
A home printer left unused for several weeks may develop partially clogged nozzles, leading to faded prints or missing colors.
2. Air in the Ink Supply System
Air bubbles inside the ink tubes interrupt ink flow, preventing the printhead from receiving a steady ink supply.
This often happens after:
- Refilling ink tanks incorrectly
- Running ink tanks completely empty
- Improper transportation of the printer
3. Using Non-Genuine Ink
Third-party inks may differ in viscosity and chemical composition, increasing the risk of:
- Faster nozzle clogging
- Sediment buildup
- Poor color accuracy
- Printhead overheating
- Reduced printhead lifespan
4. Dirty Capping Station
The capping station seals the printhead when the printer is idle. Ink residue or dust on this component can prevent proper sealing, causing the printhead to dry out more quickly.
5. Firmware or Software Issues
Corrupted firmware, interrupted updates, or outdated printer drivers can occasionally trigger printhead-related error messages even when the hardware is functioning correctly.
6. Electrical or Hardware Failure
Although less common, physical damage to the printhead or internal circuitry can result from:
- Power surges
- Liquid spills
- Manufacturing defects
- Extended heavy-duty printing
- Wear over several years
Technician Tip: Before assuming hardware failure, always perform a nozzle check, printhead cleaning, and firmware update. These simple steps often resolve issues that appear to be serious hardware faults.
How to Fix an Epson Printhead Error
To fix an Epson printhead error, first identify the cause by running a nozzle check. Then perform a printhead cleaning cycle, inspect ink levels, update printer firmware, check the maintenance box, and align the printhead. If the issue persists after multiple cleaning attempts, the printhead may require professional servicing or replacement.
Before attempting advanced repairs, always turn off the printer and disconnect it from the power source for at least 60 seconds. This simple reset can clear temporary communication errors.
Step 1: Check the Printer Display for Error Messages
Modern Epson printers often display detailed error messages that can help narrow down the issue.
Common Messages
| Error Message | Possible Cause | Recommended Solution |
|---|---|---|
| Printhead Error | Printhead communication failure | Restart printer and inspect connections |
| Printer Error | Firmware or hardware issue | Update firmware and restart |
| Ink System Error | Ink delivery problem | Check ink tanks and refill if needed |
| Maintenance Required | Waste ink counter reached | Replace maintenance box or reset counter |
| Nozzle Check Failed | Clogged nozzles | Perform head cleaning |
Expert Tip: Take note of the exact error message or code before troubleshooting. It can help identify whether the issue is software-related or hardware-related.
Step 2: Perform a Nozzle Check
A nozzle check is the quickest way to determine if the printhead is clogged.
Windows
- Open Control Panel
- Select Devices and Printers
- Right-click your Epson printer
- Choose Printing Preferences
- Open the Maintenance tab
- Click Nozzle Check
macOS
- Open System Settings
- Select Printers & Scanners
- Choose your Epson printer
- Open Options & Supplies
- Click Utility
- Run Nozzle Check
What to Look For
A healthy nozzle pattern contains solid, continuous lines with no missing segments.
If you notice:
- Broken lines
- Missing colors
- Faded areas
- Gaps in the pattern
the printhead likely has clogged nozzles.
Industry Insight: Epson recommends performing a nozzle check before running any cleaning cycle. This helps avoid unnecessary ink consumption.
Step 3: Run a Printhead Cleaning Cycle
The printhead cleaning function flushes fresh ink through the nozzles to remove minor blockages.
How to Clean the Printhead
- Open the printer maintenance menu.
- Select Head Cleaning.
- Start the cleaning process.
- Wait until it finishes.
- Run another nozzle check.
Repeat only if necessary.
Best Practice
Limit cleaning cycles to two or three consecutive attempts. Running excessive cleaning cycles wastes ink and can fill the maintenance box prematurely.
Signs Cleaning Was Successful
- No missing colors
- Smooth gradients
- Clear text
- No horizontal streaks
Step 4: Perform Power Cleaning (If Available)
Many Epson EcoTank printers include a Power Cleaning or Power Ink Flushing feature.
Unlike standard cleaning, Power Cleaning pushes a larger volume of ink through the printhead.
Use Power Cleaning When:
- Standard cleaning fails
- Printer has been unused for several weeks
- Multiple colors are missing
- Air entered the ink tubes
Avoid Overusing It
Power Cleaning consumes a significant amount of ink. Epson recommends using it only when standard cleaning does not resolve the issue.
Standard Cleaning vs. Power Cleaning
| Feature | Standard Cleaning | Power Cleaning |
|---|---|---|
| Ink Usage | Low | High |
| Time Required | 2–5 minutes | 10–20 minutes |
| Removes Minor Clogs | ✔ | ✔ |
| Removes Severe Clogs | Limited | Excellent |
| Recommended Frequency | Regular maintenance | Occasional use only |
Expert Recommendation: Use Power Cleaning sparingly, as frequent use increases ink consumption and maintenance box wear.
Step 5: Inspect Ink Levels
Low ink levels can mimic printhead problems.
Check:
- Black ink
- Cyan
- Magenta
- Yellow
For EcoTank printers:
- Ensure each tank is above the minimum fill line.
- Refill with the correct Epson ink if necessary.
Avoid allowing tanks to run completely dry, as this can introduce air into the ink system.
Step 6: Check for Air Bubbles in Ink Tubes
Air bubbles can interrupt ink flow, causing blank pages or missing colors.
Common Causes
- Empty ink tanks
- Incorrect refilling
- Moving the printer
- Long periods of inactivity
Symptoms
- Blank pages
- Missing colors
- Intermittent printing
- Uneven ink distribution
Running one Power Cleaning cycle often helps remove trapped air.
Step 7: Align the Printhead
Misalignment affects print quality even when the printhead is functioning correctly.
Signs of Misalignment
- Blurry text
- Double printing
- Jagged lines
- Poor graphics
- Crooked borders
Alignment Steps
- Open Printer Maintenance.
- Select Print Head Alignment.
- Print the alignment sheet.
- Follow the on-screen instructions.
- Save the alignment settings.
Tip: Always align the printhead after replacing ink, transporting the printer, or completing major maintenance.
Step 8: Update Printer Firmware and Drivers
Firmware updates can resolve communication errors and improve printer stability.
Update Checklist
- Install the latest Epson printer driver.
- Update firmware using Epson’s official utility.
- Restart the printer after installation.
- Reconnect the printer to your computer or network.
Avoid interrupting the firmware update process, as doing so may cause additional errors.
Step 9: Restart the Print Spooler
Sometimes the printhead error is triggered by software rather than hardware.
Windows
- Press Windows + R
- Type services.msc
- Locate Print Spooler
- Right-click
- Select Restart
This clears stuck print jobs and restores communication between the computer and printer.
Step 10: Inspect the Maintenance Box
Many Epson printers use a maintenance box or waste ink pad to collect excess ink from cleaning cycles.
A full maintenance box may prevent certain maintenance operations.
Symptoms
- Maintenance warning
- Cleaning cycles fail
- Frequent error messages
Replace the maintenance box if your printer indicates it is full.
Common Epson Printhead Problems and Solutions
| Problem | Possible Cause | Best Solution |
|---|---|---|
| Blank pages | Air in ink tubes | Power Cleaning |
| Missing black ink | Black nozzle clogged | Head Cleaning |
| Missing colors | Color nozzles clogged | Multiple cleaning cycles |
| Horizontal lines | Partial nozzle blockage | Nozzle Check + Cleaning |
| Blurry prints | Misalignment | Print Head Alignment |
| Smudged prints | Dirty printhead or rollers | Clean printer interior |
| Printer won’t recognize printhead | Firmware or hardware issue | Update firmware or service |
| Repeated printhead error | Electrical failure | Professional repair |
Common Mistakes to Avoid
Many users unintentionally make the problem worse. Avoid these common mistakes:
- Running continuous cleaning cycles without checking results.
- Using incompatible or low-quality third-party inks.
- Letting ink tanks run completely empty.
- Ignoring firmware updates.
- Leaving the printer unused for months.
- Touching the printhead nozzles with fingers or sharp objects.
- Powering off the printer by unplugging it instead of using the power button.
Expert Insight: Regular use is one of the best ways to keep Epson printheads healthy. Printing a simple color test page once a week helps prevent ink from drying inside the nozzles.
Preventive Maintenance Checklist
Use the following routine to reduce the risk of future printhead errors:
| Task | Frequency |
|---|---|
| Print a color test page | Weekly |
| Check ink levels | Weekly |
| Run a nozzle check | Monthly |
| Perform standard head cleaning | Only if nozzle check shows gaps |
| Clean exterior and paper path | Monthly |
| Update firmware and drivers | Every 2–3 months |
| Inspect maintenance box | Every 3–6 months |
| Use genuine Epson ink | Always |
When Should You Replace the Epson Printhead?
Replacing an Epson printhead should be the last resort after you’ve exhausted all standard troubleshooting methods. In many cases, repeated printhead errors are caused by clogged nozzles, air in the ink system, or outdated firmware—not a faulty printhead.
Replace the Printhead If:
- The printer continues to display a printhead error after all troubleshooting.
- The printhead is physically damaged or leaking.
- Several cleaning and power cleaning cycles have no effect.
- Colors remain missing even after alignment and nozzle cleaning.
- An authorized Epson technician confirms printhead failure.
Repair Instead of Replace If:
- The issue is caused by dried ink or clogged nozzles.
- Air bubbles are trapped in the ink tubes.
- Firmware or printer drivers are outdated.
- The maintenance box is full.
- Print quality improves after cleaning but is not yet perfect.
Expert Recommendation: For entry-level Epson printers, replacing the printhead may cost nearly as much as a new printer. For premium EcoTank or WorkForce models, professional repair is often more economical.
Advanced Troubleshooting Tips
If basic troubleshooting doesn’t solve the issue, try these advanced steps:
1. Check Printer Connections
Loose USB or network connections can interrupt communication between the printer and computer.
Try:
- Reconnecting the USB cable.
- Switching to another USB port.
- Restarting your Wi-Fi router if using wireless printing.
- Removing and re-adding the printer in your operating system.
2. Reset the Printer
A factory reset can clear temporary software glitches.
General Steps:
- Turn off the printer.
- Disconnect the power cable for 60–90 seconds.
- Reconnect the power.
- Restart the printer.
- Run a nozzle check.
Note: Menu options vary by Epson model. Refer to your printer’s user manual before performing a factory reset.
3. Check Environmental Conditions
Printhead performance can be affected by the surrounding environment.
Avoid:
- Direct sunlight
- High humidity
- Excessive dust
- Temperatures below 10°C (50°F) or above 35°C (95°F)
Store your printer in a clean, dry location and use it regularly to prevent ink from drying inside the nozzles.
Expert Maintenance Tips to Extend Printhead Life
Following these best practices can significantly improve printhead longevity:
- Print a color page at least once every week.
- Use genuine Epson inks whenever possible.
- Never allow ink tanks to become completely empty.
- Always power off the printer using its power button.
- Perform nozzle checks before running cleaning cycles.
- Keep the printer covered when not in use.
- Install firmware updates from Epson when available.
- Clean the exterior regularly to reduce dust buildup.
Quick Troubleshooting Checklist
Use this checklist before considering professional repair:
Check ink levels.
Run a nozzle check.
Perform one standard head cleaning.
Repeat cleaning only if needed (maximum 2–3 times).
Use Power Cleaning for severe clogs (if supported).
Align the printhead.
Update printer drivers and firmware.
Restart the printer and print spooler.
Inspect the maintenance box.
Contact Epson support if the error persists.
Conclusion
An Epson printhead error doesn’t always mean your printer is beyond repair. In most situations, the problem stems from clogged nozzles, interrupted ink flow, outdated firmware, or routine maintenance issues that can be resolved with a systematic approach.
By performing regular nozzle checks, using quality ink, keeping firmware updated, and following a simple maintenance schedule, you can prevent many printhead-related problems before they occur. If troubleshooting doesn’t resolve the issue and the printhead is confirmed to be faulty, consult an authorized Epson service center to determine whether repair or replacement is the most cost-effective option.
With the right care, Epson printheads are designed to deliver reliable performance and excellent print quality for years.
Frequently Asked Questions (FAQ)
1. What causes an Epson printhead error?
Common causes include clogged nozzles, dried ink, air in the ink system, firmware issues, electrical faults, and physical damage to the printhead.
2. Can I fix an Epson printhead error myself?
Yes. Many printhead errors can be resolved by performing a nozzle check, head cleaning, printhead alignment, updating firmware, and checking ink levels.
3. How often should I clean my Epson printhead?
Only clean the printhead when a nozzle check shows missing lines or poor print quality. Unnecessary cleaning wastes ink.
4. Does head cleaning use ink?
Yes. Every cleaning cycle uses ink to flush the nozzles, so avoid running repeated cleaning cycles without checking results.
5. Why is my Epson printer printing blank pages?
Blank pages may be caused by clogged nozzles, air in the ink lines, empty ink tanks, or incorrect printer settings.
6. Is it safe to use third-party ink?
While some third-party inks work, incompatible ink formulations can increase the risk of clogging and reduced print quality. Genuine Epson ink is generally the safest option.
7. What is Power Cleaning?
Power Cleaning is an intensive maintenance function available on many EcoTank models that pushes a larger volume of ink through the printhead to clear stubborn clogs.
8. How long does an Epson printhead last?
With proper maintenance and regular use, an Epson printhead can last for many years. Lifespan varies depending on print volume, maintenance habits, and ink quality.
9. Should I replace the printhead or buy a new printer?
For budget printers, replacing the printhead may not be cost-effective. For premium EcoTank or WorkForce models, professional repair or replacement is often worthwhile.
10. Can dried ink permanently damage a printhead?
If left unused for a long time, dried ink can cause severe clogging. Early intervention with proper cleaning improves the chances of recovery.