Epson Ink Charging Failed: Complete Troubleshooting Guide
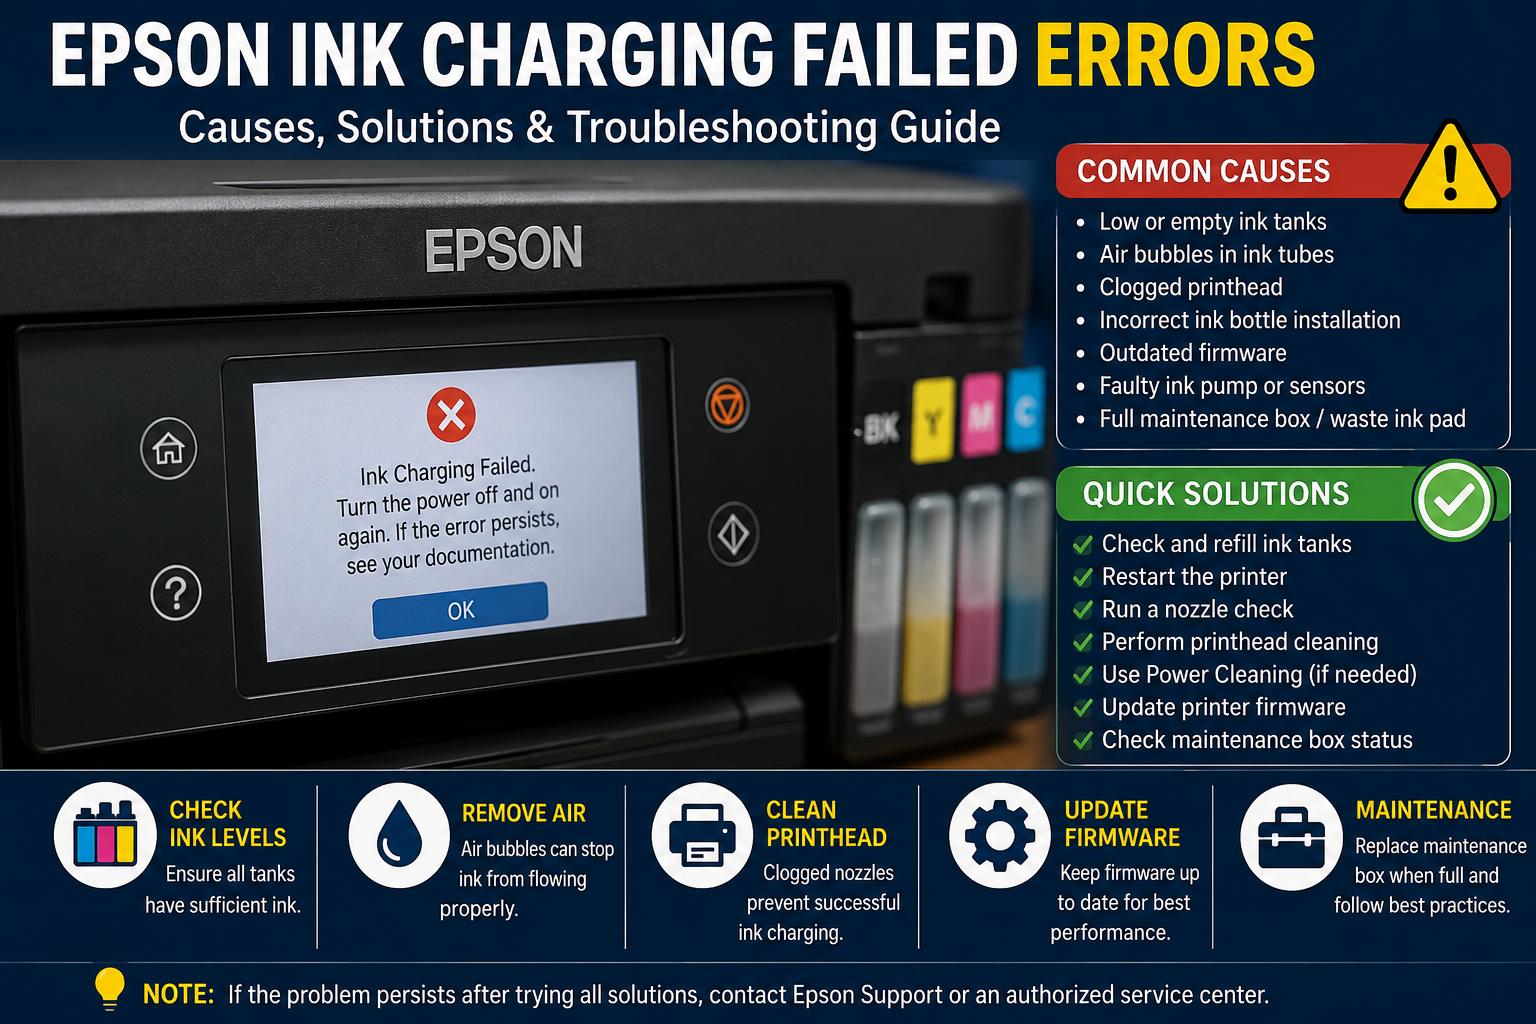
Epson ink charging failed is an error that occurs when the printer cannot successfully move ink from the cartridges or ink tanks through the internal tubes into the printhead. This process is essential during initial setup, after replacing ink, or following certain maintenance procedures. If charging is interrupted, the printer cannot prepare the ink system for printing.
Unlike regular printhead cleaning, ink charging fills the entire ink delivery system. Because it involves multiple components working together, even a small issue can stop the process.
What You’ll Learn
In this guide, you’ll discover:
- What Epson ink charging actually does
- Why the charging process fails
- Common software and hardware causes
- Step-by-step troubleshooting methods
- Advanced repair techniques
- Preventive maintenance tips
- When to contact Epson support
- Frequently asked questions
- Expert recommendations for long-term printer health
Why Epson Printers Perform Ink Charging
Ink charging is much more than simply filling the printhead. During this process, the printer prepares the complete ink delivery system for accurate printing.
The printer automatically pumps ink through internal tubes while removing trapped air. Sensors monitor pressure and ink flow to ensure every color channel receives enough ink.
Without successful ink charging, the printhead may receive little or no ink, resulting in blank pages, missing colors, or complete printing failure.
Ink Charging Typically Occurs During:
- Initial printer setup
- Installing new ink cartridges
- Refilling EcoTank ink tanks
- Running Power Cleaning
- Replacing internal components
- Certain firmware recovery procedures
How the Epson Ink Charging Process Works
Understanding the charging process makes troubleshooting much easier.
Step 1: Ink Detection
The printer first confirms that all installed cartridges or ink tanks contain sufficient ink.
Step 2: Cartridge Verification
Electronic sensors verify each cartridge or tank.
Step 3: Ink Pump Activation
A small internal pump begins drawing ink into the printer.
Step 4: Air Removal
Any trapped air inside the ink tubes is removed.
Step 5: Printhead Priming
Ink reaches the printhead nozzles.
Step 6: Pressure Verification
Internal sensors verify proper ink pressure.
Step 7: Charging Complete
The printer becomes ready for printing.
If any step fails, the charging process stops and an error message appears.
Common Causes of Epson Ink Charging Failed
There is rarely a single reason behind this error. In most cases, several factors contribute to the problem.
1. Empty or Low Ink Tanks
One of the most common causes is insufficient ink.
Even if only one color is empty, Epson printers may stop the entire charging process.
Signs
- Low ink warning
- Recently refilled printer
- Air entering ink tubes
2. Air Bubbles in Ink Tubes
Air pockets prevent ink from reaching the printhead.
This commonly occurs after:
- Refilling tanks
- Replacing cartridges
- Long-term storage
- Transporting the printer
Symptoms include:
- Endless charging
- Missing colors
- Blank pages
- Interrupted charging cycles
3. Improper Ink Bottle Installation
EcoTank printers require each bottle to lock correctly during refilling.
Improper installation can result in:
- Incomplete filling
- Incorrect ink level detection
- Charging interruption
Always ensure bottles are inserted fully and the tank reaches the recommended fill level.
4. Clogged Printhead
If dried ink blocks the printhead, fresh ink cannot circulate properly.
This often happens when:
- The printer sits unused for weeks.
- Non-genuine ink is used.
- Regular maintenance is skipped.
- The environment is dusty or very dry.
Common symptoms include streaks, faded colors, and repeated ink charging attempts.
5. Faulty Ink Pump
The internal ink pump is responsible for moving ink from the cartridges or tanks to the printhead.
A worn or damaged pump may fail to generate enough suction, causing the charging process to stop before completion.
Possible signs include:
- Loud grinding or clicking sounds during charging
- Ink charging never completes
- Blank pages after setup
- Repeated maintenance cycles with no improvement
Professional servicing may be required if the pump has failed.
6. Incorrect Ink Cartridge or Ink Bottle
Using incompatible or counterfeit ink products can prevent the printer from recognizing the ink correctly.
Common signs include:
- Ink not recognized
- Charging starts but stops midway
- “Replace Ink” message appears
- Printer refuses to continue setup
Expert Tip: Always use genuine Epson ink bottles or cartridges designed specifically for your printer model. Genuine inks are formulated with the correct viscosity and chemical properties for Epson printheads.
7. Firmware Issues
Printer firmware controls every stage of ink charging. If the firmware is outdated or corrupted, communication between sensors and internal components may fail.
Firmware-related problems may occur after:
- Interrupted firmware updates
- Failed software installations
- Power loss during updates
- Corrupted printer memory
Keeping firmware up to date can resolve bugs that affect ink charging and improve overall printer performance.
8. Dirty Cartridge Contacts
Dust, dried ink, or fingerprints on the electrical contacts can prevent the printer from detecting the cartridge properly.
Clean the contacts carefully:
- Turn off the printer.
- Remove the cartridges.
- Use a lint-free cloth lightly dampened with isopropyl alcohol.
- Allow the contacts to dry completely.
- Reinstall the cartridges securely.
Avoid touching the contacts with bare fingers after cleaning.
9. Power Interruption During Charging
The ink charging process should never be interrupted.
If power is lost while charging:
- Air may enter the ink system.
- Ink pressure may become uneven.
- The charging cycle may fail to restart correctly.
Using a surge protector or UPS can help prevent interruptions during setup or maintenance.
10. Blocked Ink Tubes
EcoTank printers use transparent ink tubes to transport ink from the tanks to the printhead.
If these tubes become blocked due to dried ink or trapped air, ink flow may stop completely.
Possible causes include:
- Long periods of inactivity
- Extremely hot environments
- Use of incompatible ink
- Internal contamination
11. Waste Ink Pad or Maintenance Box Near Capacity
Some Epson models may stop certain maintenance operations, including ink charging, when the waste ink pad or maintenance box reaches its service limit.
Watch for messages such as:
- Maintenance Box Full
- Waste Ink Pad End of Service Life
- Printer Requires Service
Replacing the maintenance box or resetting the waste ink counter (where appropriate) may be necessary before charging can continue.
12. Internal Sensor Failure
Epson printers rely on multiple sensors to monitor:
- Ink pressure
- Ink level
- Cartridge presence
- Pump operation
- Printhead position
A faulty sensor can incorrectly report an error even when the ink system is functioning normally.
Step-by-Step Guide to Fix Epson Ink Charging Failed
Follow these troubleshooting steps in order. Start with the simplest solutions before considering hardware repairs.
Step 1: Restart the Printer
A temporary software glitch may interrupt the charging process.
- Turn off the printer.
- Unplug the power cable.
- Wait 5 minutes.
- Reconnect the power.
- Turn the printer back on.
- Check whether charging resumes automatically.
This simple reset often resolves temporary firmware issues.
Step 2: Verify Ink Levels
Ensure every ink tank or cartridge contains enough ink.
Check for:
- Empty tanks
- Incorrectly installed cartridges
- Leaking cartridges
- Expired cartridges
Never attempt ink charging with an empty color tank, even if you only print in black.
Step 3: Check Ink Bottle Installation (EcoTank Models)
If you’ve recently refilled your printer:
- Confirm every bottle clicked into place during filling.
- Ensure each tank reached the recommended fill line.
- Verify the correct color was added to the correct tank.
- Inspect for leaks around the tank openings.
Improper filling can introduce air into the ink delivery system.
Step 4: Run a Nozzle Check
A nozzle check reveals whether ink has reached the printhead.
Results and meaning:
| Nozzle Check Result | Likely Cause | Recommended Action |
|---|---|---|
| Perfect pattern | Ink system working | Continue printing |
| Missing lines | Partial clog | Run printhead cleaning |
| Blank page | Ink not reaching printhead | Inspect ink charging system |
| Missing colors | Air bubbles or clogged channel | Perform Power Cleaning if available |
Avoid running repeated cleanings without checking results, as each cleaning consumes ink.
Step 5: Perform Printhead Cleaning
If the nozzle check shows missing lines:
- Open the printer maintenance menu.
- Select Printhead Cleaning.
- Wait for the process to finish.
- Print another nozzle check.
- Repeat only if necessary.
Running too many cleaning cycles in succession can fill the waste ink pad prematurely.
Step 6: Perform Power Cleaning (If Supported)
Power Cleaning forces a larger amount of ink through the system and is useful for clearing stubborn air bubbles.
Use this feature only when:
- Standard cleaning fails.
- Air is trapped after refilling.
- Epson specifically recommends it.
Important: Power Cleaning consumes significantly more ink than standard cleaning.
Step 7: Inspect the Ink Tubes
On EcoTank printers with visible tubes:
Check for:
- Air gaps
- Kinks
- Ink separation
- Empty sections
- Leaks
Healthy ink tubes should appear consistently filled with ink.
Step 8: Update Printer Firmware
Install the latest firmware version available for your printer model.
Firmware updates may improve:
- Ink charging reliability
- Cartridge recognition
- Error handling
- Printer stability
Always avoid turning off the printer during the update process.
Step 9: Inspect the Maintenance Box
Some Epson models use a replaceable maintenance box instead of a permanent waste ink pad.
If full:
- Replace the maintenance box.
- Restart the printer.
- Retry ink charging.
Step 10: Contact Epson Support
If all troubleshooting steps fail, the issue may involve:
- Failed ink pump
- Damaged printhead
- Faulty mainboard
- Defective sensors
- Internal tubing damage
Professional diagnosis is recommended for these hardware issues.
| Problem | Possible Cause | Recommended Fix |
|---|---|---|
| Ink charging won’t start | Cartridge not recognized | Reinstall cartridge |
| Charging stops midway | Air bubbles | Perform Power Cleaning |
| Printer stuck charging | Firmware issue | Update firmware |
| Blank pages after charging | Printhead clog | Run nozzle check and cleaning |
| Error returns repeatedly | Ink pump failure | Service required |
| Missing colors | Air in ink tubes | Inspect tubes and clean printhead |
| Charging after refill fails | Incorrect refill | Verify tank levels and refill procedure |
| Maintenance error shown | Full maintenance box | Replace maintenance box |
Common Mistakes to Avoid
Many users accidentally make the problem worse by trying multiple fixes without understanding the cause.
Avoid these common mistakes:
- Turning the printer off during ink charging.
- Running repeated Power Cleaning cycles.
- Using third-party or incompatible ink.
- Ignoring low ink warnings.
- Mixing different ink brands.
- Transporting the printer without securing the ink system.
- Touching cartridge contacts with bare fingers.
- Skipping regular nozzle checks.
- Leaving the printer unused for long periods.
Preventing Epson Ink Charging Problems
Routine maintenance is the best way to reduce the likelihood of charging failures.
Best Practices
- Print at least one color page every week.
- Keep ink tanks above the minimum level.
- Use genuine Epson ink whenever possible.
- Store the printer in a clean, dust-free environment.
- Update firmware periodically.
- Run nozzle checks monthly.
- Replace maintenance boxes when required.
- Avoid unplugging the printer during maintenance cycles.
Consistent care helps maintain smooth ink flow and extends the life of the printhead.
Expert Recommendations
Based on common service-center experiences, most Epson ink charging failed errors are caused by air entering the ink system after refilling, clogged printheads from infrequent use, or interrupted maintenance cycles—not by major hardware failure.
Before assuming the printer needs repair:
- Start with basic checks such as ink levels and cartridge installation.
- Perform a nozzle check to identify whether ink is reaching the printhead.
- Use Printhead Cleaning before attempting Power Cleaning.
- Avoid repeating cleaning cycles unnecessarily, as they consume ink and increase waste ink accumulation.
- If the problem persists after all software-based troubleshooting, inspect the ink delivery system or seek professional service for potential pump, sensor, or printhead issues.
Conclusion
An Epson ink charging failed error can be frustrating, especially during initial setup or after refilling your printer. Fortunately, in most cases the problem is caused by issues such as trapped air, low ink, clogged printheads, incorrect cartridge installation, or temporary firmware glitches rather than permanent hardware damage.
By following a systematic troubleshooting process—checking ink levels, inspecting cartridges or tanks, running nozzle checks, cleaning the printhead, updating firmware, and examining the maintenance system—you can often restore normal operation without costly repairs.
Regular maintenance, genuine Epson ink, and proper shutdown procedures will also help prevent future ink charging failures, ensuring reliable print quality and extending the lifespan of your Epson printer.
Frequently Asked Questions (FAQ)
1. Why does my Epson printer say ink charging failed?
An Epson printer displays an ink charging failed message when it cannot successfully move ink from the cartridges or EcoTank reservoirs through the ink delivery system to the printhead. Common causes include low ink levels, trapped air, clogged printheads, incorrect cartridge installation, firmware issues, or hardware faults.
2. How long should Epson ink charging take?
For most Epson printers, the initial ink charging process takes 10 to 20 minutes. Larger EcoTank or business models may require up to 25 minutes. If charging continues much longer, troubleshooting is recommended.
3. Can I restart the ink charging process?
Yes. Turn the printer off, wait a few minutes, restart it, and follow the on-screen instructions. Some models automatically resume the charging cycle, while others require a maintenance utility or setup software.
4. Does low ink cause ink charging to fail?
Yes. Even if only one color is low or empty, the printer may stop the entire charging process because all color channels must be properly primed before printing.
5. Can air bubbles stop ink charging?
Yes. Air trapped inside the ink tubes interrupts normal ink flow and is one of the most common reasons EcoTank printers fail during ink charging.
6. Is it safe to perform Power Cleaning?
Yes, but only when necessary. Power Cleaning consumes significantly more ink than a standard printhead cleaning cycle, so it should be used only when recommended.
7. Will updating firmware fix ink charging errors?
Sometimes. Firmware updates can resolve software bugs affecting cartridge recognition, sensor communication, and maintenance operations. However, they won’t repair physical hardware failures.
8. Can third-party ink cause charging problems?
Yes. Low-quality or incompatible ink may have different viscosity and chemical properties, leading to poor ink flow, clogged printheads, or cartridge recognition issues.
9. Should I replace the printhead immediately?
No. Most charging failures are caused by maintenance or ink delivery issues rather than a damaged printhead. Always complete the recommended troubleshooting steps first.
10. What happens if I interrupt ink charging?
Interrupting the charging process may introduce air into the ink system, leave the printhead partially primed, and increase the likelihood of print quality issues.
11. Can a full maintenance box stop ink charging?
Yes. On some Epson printer models, a full maintenance box or waste ink pad prevents maintenance operations until it is replaced or serviced.
12. How often should I print to prevent ink charging problems?
Printing at least one color page every week helps keep ink flowing through the printhead and reduces the risk of dried ink or air entering the system.
13. Why is my Epson printer stuck on “Charging Ink”?
The printer may be unable to complete the charging cycle due to trapped air, blocked ink tubes, a faulty ink pump, insufficient ink, or a software issue. Inspect the ink system and run the recommended maintenance procedures.
14. Can I use my printer while ink charging is in progress?
No. Wait until the charging process finishes completely before attempting to print or perform other maintenance tasks.
15. When should I contact Epson Support?
Seek professional assistance if:
- The printer repeatedly fails to complete ink charging.
- Hardware components such as the ink pump or printhead appear defective.
- Error messages persist after completing all recommended troubleshooting steps.
- Firmware updates and maintenance procedures do not resolve the issue.